Error Driver Pnp Watchdog
Error Driver Pnp Watchdog. Hey Everyone,I've been handed a clients device which is currently displaying a BSOD error and Is completely unable to boot; (into.
Summary :
If you are experiencing the DRIVER PNP WATCHDOG BSOD error, don’t be panic. It is not hard to fix at all. You can refer to this post offered by MiniTool Solution to get some effective methods. You can try to run a full system scan with antivirus, run SFC to repair PC registry, run Windows Automatic Repair and more.
Quick Navigation :
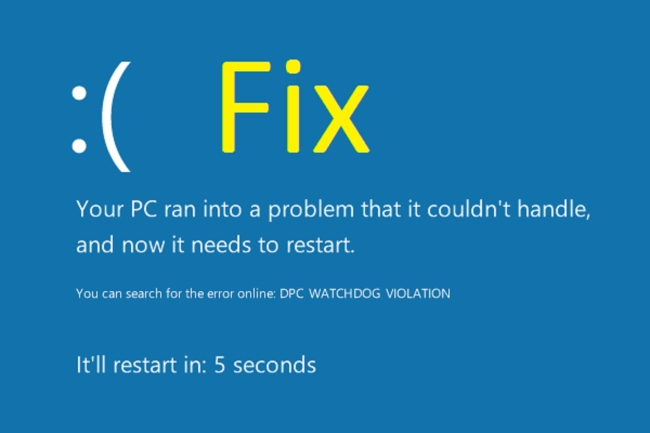
The DRIVER PNP WATCHDOG BSOD Error
DRIVER PNP WATCHDOG is one of the BSOD errors. BSOD (Blue Screen of Death) is a stop error that is used to protect your computer if the computer meets an error so that it cannot run properly.
The DRIVER PNP WATCHDOG error is a system issue. It often occurs when you try to upgrade to Windows 10 version: Firstly, the update gets initiated but then it freezes at the middle and finally the Blue Screen of Death with the DRIVER PNP WATCHDOG error will show up.
What causes DRIVER PNP WATCHDOG error? There are many reasons for this error. It may be triggered by corrupted system files and drives, outdated device drivers, the presence of viruses and other malware and so on. You will be unable to install main upgrades when the DRIVER PNP WATCHDOG error comes.
Thus, how to fix DRIVER PNP WATCHDOG? The following part will show you different methods to easily solve this error.
In today's post, learn how to effectively recover data after blue screen of death and how to fix the blue screen of death error.
Solution 1: Check Volume Shadow Copy Service
If the Volume Shadow Copy Service (VSS) is not running properly, the DRIVER PNP WATCHDOG problem may occur. Follow this method to check if the VSS is running properly.
If you meet “The VSS service is shutting down due to idle timeout” error and don’t know how to fix it, you can read this post to get some useful methods.
Step 1: Press the Win key + R key together to open the Run dialog box. Next, type services.msc and press Enter to open the Services window.
Step 2: Find the Volume Shadow Copy service in the list. Double-click it to open its Properties window.
Step 3: Set Startup type to Automatic and set Service status set to Running. Then click Apply and then OK to save your changes.
Step 4: Restart your computer.
Now, check if the problem has been solved.
Solution 2: Run a Full System Scan with Antivirus
The DRIVER PNP WATCHDOG error may also occur due to viruses and malware. That’s because your important files and services which are used to communicate with any hardware device by the system will be affected.
Thus, you should run a full system scan for viruses and malware so as to remove them. You can try to use a built-in antivirus tool in Windows - Windows Defender or try any third-party antivirus to do this job. Here are the steps on how to do that with Windows Defender.
Troubled by Windows Defender not turning on? Here are full solutions to repair Windows Defender in Windows 10/8/7 and the best way for PC protection.
Step 1: Press the Win key + I key to open the Windows Settings window.
Step 2: Click Update & Security and click the Windows Defender option from the left side.
Step 3: Click the Open Windows Defender Security Center button from the right side.
Step 4: In the pop-up window, click Virus & threat protection.
Step 5: Click Advanced scan next to the Quick scan button.
Step 6: Check Full scan and then click Scan now. Windows Defender will start to scan your computer and report any findings to you.
After the scan to complete, remove the viruses or malware according to the removal instructions offered by your antivirus program. Next, check if the “Stop code: DRIVER PNP WATCHDOG” error has left your PC.
If Antivirus cannot detect any virus or malware on your computer, now move to the next method below.
Solution 3: Tweak with System Services
System services are the main components to make sure your system can function properly. If any of service is faulty, the DRIVER PNP WATCHDOG BSOD error may occur. In this case, you can try to tweak with some of the required services to solve the problem.
Step 1: Type cmd in the Search bar, right-click Command Prompt and choose Run as administrator. When the User Account Control window pops up, click Yes.
Check what is elevated Command Prompt, how to open elevated Command Prompt Windows 10 in 4 ways, how to create a shortcut for elevated Command Prompt.
Step 2: Type the following commands one by one and press Enter after each one:
net stop wuauserv
net stop cryptSvc
net stop bits
net stop appIDSvc
Step 3: After running the commands, navigate to Local Disk (C:)WindowsSoftwareDistribution. Rename SoftwareDistribution to SoftwareDistribution.old.
Step 4: Now, navigate to Local Disk (C:)WindowsSystem32catroot2. Rename catroot2 to catroot2.old.
Step 5: Open the Command Prompt window again, then type the following commands one by one and press Enter after each one:
net start wuauserv
net start cryptSvc
Gpt website php script rar files pdf. net start bits
net start msiserver
net start appIDsvc
Step 6: Exit Command Prompt.
Step 7: Right-click the Start menu and then choose Windows PowerShell (Admin) to open it.
Step 8: Type the command: wuauclt.exe /updatenow and press Enter.
After that, restart the system and check if the DRIVER PNP WATCHDOG error has gone. If not, move down to the next method.
Solution 4: Run SFC to Repair PC Registry
Your system files may be corrupted and then this problem leads to damaged Windows registry. Finally, the DRIVER PNP WATCHDOG error appears. Thus, you should run SFC to repair your Windows registry. The following part will show you how to run an SFC scan on Windows 10.
Step 1: Type cmd in the Search bar, right-click Command Prompt and select Run as administrator. When the User Account Control window pops up, click Yes.
Step 2: Input this command: sfc /scannow and press Enter to run it. System File Checker will start to scan all system files and then help you repair the corrupted and missing system files.
Step 3: Wait for the scanning process to complete, and then restart your PC. All corrupted files will be replaced.
Now check if the DRIVER PNP WATCHDOG error has been fixed. If not, move down to the next method below.
Solution 5: Run Windows Automatic Repair
If you have a Windows bootable installation DVD, now you can try to Run Automatic Repair to fix this error.
Windows Automatic Repair not working! Read this post to find how to solve Windows couldn't load correctly and Automatic Repair couldn't repair your PC.
Step 1: Insert your Windows bootable installation DVD and then restart your PC.
Step 2: Press a certain key (depending on the brand of your computer) to access BIOS. If you want to know how to go to BIOS, refer to this post: How to Enter BIOS Windows 10/8/7 (HP/Asus/Dell/Lenovo, any PC).
Step 3: Set the DVD as the first boot device so as to boot your computer from DVD.
Step 4: Select your language and other preferences, and click Next.
Step 5: Now, click Repair your computer.
Step 6: Click Troubleshoot > Automatic Repair and choose your target operating system. Then, wait for the Windows Automatic Repair to be complete.
Step 7: Restart your PC.
Check if you are still encountering the same problem.
Laptop stuck on Preparing Automatic Repair during startup? Read this post and find how to effectively and quickly solve this issue.
Solution 6: Run the Windows Updates Troubleshooter
If Windows Update fails to perform a particular operation, BSOD always appears. Now try to run the Windows Updates troubleshooter to deal with this the DRIVER PNP WATCHDOG error.
Step 1: Press the Win key + I key to open the Windows Settings window.
Step 2: Click Update & Security and click the Troubleshoot option from the left side.
Step 3: Find Windows Update in the list on the right. Click it, click Run the troubleshooter.
Restart your PC and check if the DRIVER PNP WATCHDOG error has been resolved.
If you are looking for solutions to the Windows update troubleshooter 0x803c0103 error code, this post is what you need since it shows the reliable solutions.
Solution 7: Reset Your PC to Its Factory Settings
You can also try to reset your OS to its factory settings. In this way, all of your services, drivers and apps will be uninstalled. Meanwhile, all the changes you have made to your system settings and preferences will be cleared.
As for your data and files saved on the computer, you can choose to keep or remove them. Now, let’s start to reset your PC with the following instructions.
To factory reset Windows 10, you can fix operating system problems, improve performance, and release free space.
Step 1: Press the Win key + I key to open the Windows Settings window.
Step 2: Click Update & Security and click the Recovery option from the left side.
Step 3: Click Get started under Reset this PC.
Step 4: Choose Keep my files or Remove everything. Take the latter as an example.
Step 5: Choose Only the drive where Windows is installed or All drives.
Step 6: Choose Just remove my files or Remove files and clean the drive.
Step 7: Click Reset in the Ready to reset this PC window.
Step 8: Wait for the process to complete.
Useful Suggestion: Create a System Image
After trying the fixes above, you should manage to solve the DRIVER PNP WATCHDOG error. Right now, here is a useful suggestion for you. To avoid something wrong with your system in the future, you had better create a system image.
In this way, you can perform quick disaster recovery with the created system image if you encounter the BSOD error again.
A piece of free backup software - MiniTool ShadowMaker will be your good assistant. It is compatible with Windows 7/8/10. With it, you can back up files, folders, partitions, the hard drive or your Windows operating system. Its functionality is more than this.
If you have a need, you can free download MiniTool ShadowMaker Trial now. You can use the Trial Edition for 30 days for all backup features. If you want to use MiniTool ShadowMaker permanently, upgrade this freeware to its Pro Edition by clicking this link.
Right now, let’s start to back up the system with MiniTool ShadowMaker.
Step 1: Choose a Backup Mode
1.Launch MiniTool ShadowMaker.
2.Click Keep Trail to use the Trial Edition.
3.Then click Connect in the Local section to manage the local computer.
Step 2: Select Your System as Backup Source
Actually, the system reserved partition and C drive on your computer are already selected by default. Thus, you don’t need to choose them again.
Optional: If you want to choose another backup source, you are allowed to do so.
Step 3: Select a Destination Path to Save Your System Image
1.Click the Destination tab in the Backup page.
2.There are four available destination paths. Select a suitable destination path and then click OK. It is recommended to select an external hard drive as your destination path.
Step 4: Start to Back up
1.Click Back up Now to start this backup task immediately. Alternatively, if you want to delay this process, you can also choose Back up Later and then click Back up Now on the Manage page to continue.
2.Click Yes to confirm to perform the backup operation right now. At the same time, you can also choose whether to check the option: Shut down the computer when all the running backup tasks are finished.
After you finish all the steps above, right now you should create a system image with MiniTool ShadowMaker successfully.
Conclusion
Hopefully, you should have solved the DRIVER PNP WATCHDOG error and now you can use your computer normally. Besides, hope you have successfully made a backup with our powerful backup program - MiniTool ShadowMaker.
If you are having some trouble when you are using MiniTool ShadowMaker, contact us by sending an email to [email protected].
Most of the Windows users facing “Driver PNP Watchdog Error” while installing Windows updates. This error usually occurs when the windows user tries to upgrades to Windows 10 version.
During such time, the update gets initiated but freeze at the middle by display BSOD (Blue Screen of Death) with Driver PNP Watchdog Error. The reasons for such an issue might be due to outdated drivers, damaged PC registry, viruses or malware or faulty hard drive.
Thus, the user cannot able to install main upgrades when Driver PNP Watchdog Error comes. There are different methods to easily solve Driver PNP Watchdog Error.
Contents
- 1 Methods To Fix Driver PNP Watchdog Error
Methods To Fix Driver PNP Watchdog Error
The solution for what is watchdog windows 10 and the steps involved in fixing the errors are given in the below-mentioned topics.
Automatic Solution
Fixing system errors is not a simple task as you think because it requires some above-average skills. Therefore, if you are not experienced enough then you can prefer for automatic tool.
Note: All repairing tasks must be done in “Safe Mode with Networking”. In order to load your system for this specific mode, consider the following steps:
For Windows XP/Vista/7/8.1
- Step 1: You must reboot your PC or laptop
- Step 2: When you turn on your system press F8 Button
- Step 3: You will get “Advanced Boot Options” menu in the screen
- Step 4: Choose “safe mode with networking”
For Windows 10
You cannot able to access the windows configuration when the Windows 10 fails to load. In such a situation, you can try with this simple method. For that, Windows 10 gets into “Automatic Repair Mode” when it gets fail to boot three times.
SolidWorks 2012 x64 Edition SP04.The most popular version of this product among our users is 20.4. The product will soon be reviewed by our informers. Download SolidWorks 2012 SP5.0 32bit 64bit full crack 100% working link download SolidWorks 2012 SP5.0 win32 win64 full license SolidWorks 2012 SP5.0 x86 x64 high speed downloading. SolidWorks 2012 SP5.0 32bit 64bit Full Multilanguage Integrated Designing with SolidWorks 2012 SP5.0 x86 x64 Full Multilanguage Integrated. Solidwork 2012 Free Download Full Version With Crack 32-bit Download SolidWorks 2016 Crack Premium Edition Download full version on. SolidWorks 2016 Crack Free Download. Solidworks 2012 for Sale. Read Customer Reviews & Find Best Sellers. Free 2-Day Shipping w/Amazon Prime. Solidworks 32 Bit Crack Torrent kms windows. How to install solidworks 2012. SolidWorks Enterprise PDM. SolidWorks Enterprise Product Data Management (EPDM) is a full-featured data management solution for any size organization. Programs for query ″solidworks 2012 64 bit free download″ IMOLD for SolidWorks. IMOLD aims to simplify mold design process and help mold designers to be more productive. Download Solidworks 2012 x64 + Crack. Linkmaxspeed.com-Solidworks 2012 x64 + Crack. ← Solidworks 2012 x86 + Crack. NX 11 Full Crack → Game Of Thrones Season 02 Ep 03. December 14, 2019. Suits Season 08 Ep 13. January 12, 2020. Extract the file with the password is linkmaxspeed.com. How to Download/unrar file download from Linkmaxspeed.com.
To turn on the “Automatic repair mode”, you have to press the reset button after viewing the windows logo.
By doing this correctly, you can view the windows screen showing that your windows are ‘Preparing Automatic Repair’.
- Step 1: After completion of “Automatic Repair” loading, press “Advanced Options” menu button
- Step 2: Choose “Troubleshoot” option on the next screen
- Step 3: From the Troubleshoot, choose Advanced options and then Startup settings & then press the restart button
- Step 4: After restarting the Windows 10, you need to press F5 to “Enable safe mode with networking”
Once windows get loaded, download CCleaner & launch it. After downloading, open ccleaner & press scan button to run windows errors & registry issues. The program will identify and fix all the errors thus preventing OS from booting.
Manual Solution For The Error
If the above auto repair fails, you will have to go for the below mentioned manual methods. Which if followed properly can resolve the issue as good as the automatic method.
Solution 1: Remove Problematic Registry Entries
The windows 10 watchdog error can be fixed by removing the problem causing registry entries
- Step 1: Press Windows Key + R
- Step 2: Type “regedit” and press “enter” button
- Step 3: Consider the path HKEY_LOCAL_MACHINECOMPONENTS
- Step 4: Eliminate the below-mentioned entries
- PendingXMLIdentifier
- AdvancedInstallersNeedResolving
- NextQueryEntryIndex
- Reboot your PC
Note: This method works only for older OS. It will not work in Windows 10
Solution 2: Re-register The Needed Components
Here are the steps to re-register the components required for watchdog registry
- Step 1: Start your Search for “command prompt” as administrator
- Step 2: Input the following commands and press Enter button after each
- Step 3: Then exit and reboot PC
Note: Users who are not sure regarding the system type which they use then just right-click computer icon and select properties in the window to view the information regarding system version.
Solution 3: Permit VSS Copy
- Step 1: Visit control panel
- Step 2: Modify the view type to “Icons”
- Step 3: Select “Administrative Tools” & go to the “Services” tab
- Step 4: Double click the “Volume Shadow Copy” service present at the bottom of the window
- Step 5: Press “Startup type” menu & choose “Automatic”
- Step 6: Confirm it by pressing OK button
Solution 4: Delete the Conflicting file
You can use this method when the error message occurs when you are installing software via InstallShield
- Step 1: Go to C:Program filescommon filesInstallShieldProfessionalRuntimeISProbe.tlb
- Step 2: Then remove ISProbe.tlb file
Note: You are supposed to view hidden folders and files to identify the file. To accomplish this, open “control panel” & click “folder options”. In the window page, consider tab ‘View’ and select the option “Show hidden folders, files and drivers”.
Solution 5: Rerun windows update
There are situations where your windows update gets disrupted or halted by background process thus creating Driver PNP watchdog problem. Thus, it is recommended to rerun the windows update.
- Step 1: Consider the start button and input settings to choose “launch settings”
- Step 2: Consider update and security menu
- Step 3: In the windows update screen, check for recommended updates and install needed updates
- Step 4: After that restart your PC
Conclusion
From the above-mentioned article, you might have come to a conclusion that you can make use of any solution listed above to potentially solve Driver PNP watchdog problem.