Oblivion Fast Travel Mod
It may not be the best choice to copy & paste for your own Mods page. Makes it much easier to tell what kind of terrain you're fast-travelling.
|
Oblivion Vanilla Enhanced
An up to date, ENB compatible guide focused on improving Oblivion's visuals without drastically altering anything from its original appearance. This guide assumes that the user has Shivering Isles and KOTN installed, anyone that doesn't can just skip over the DLC related mods though. Oblivion Reloaded isn't included, but given its popularity I'm going to mention which mods to ignore if you want to use it with this modlist. Any mid to high range pc should be able to get very good performance using this guide. CPU matters most for Oblivion and using an i5 4670k @ 4.0 Ghz I generally get a solid 60 fps at 1440p. For the best results this is meant to be followed from top to bottom, though you can skip over any mods you don't like or replace them with an alternative if you want. If a mod adds or changes something you don't need, like a mod adding controller functionality when you use keyboard and mouse, then you obviously don't have to install it.
Feel free to use the mod manager of your choice while going through the guide, but I'm going to assume that the user is installing everything manually and will only mention using a mod manager when it's necessary. Before starting, it's a good idea to install the game outside of the Program Files folder so you don't have to deal with any UAC issues. As you follow the guide, unless I say otherwise you should just download the main file and extract the mod to the appropriate directory, overwriting anything that was already there. Any optional files or updates you download should be installed after the main file. 7-Zip is a good program for dealing with zip files if you don't already have one. You can load up your game at pretty much any point in the guide to see how things look, just do the first 3 steps in the Bashed Patch section first. The 3rd step involving BSA Redirection only needs to be done once, but the others should be repeated if your load order changes.
For those who may be interested, I've also made a short gameplay enhancement guide based around Oscuro's Oblivion Overhaul (OOO). Despite being a gameplay overhaul, OOO also includes some visual modifications of its own. So to keep the two guides compatible I'll also make note of the mods you can ignore that would be redundant when using OOO.
Screenshots with and without ENB
Suggested Video Options
- Brightness: 50%
- Texture Size: Large
- Tree Fade: 100%
- Actor Fade: 100%
- Item Fade: 100%
- Object Fade: 100%
- View Distance: 100%
- Grass Distance: 100%
- Distant Land: On
- Distant Buildings: On
- Distant Trees: On
- Int. Shadows: 10
- Ext. Shadows: 10
- Self Shadows: Off
- Shadows on Grass: Off
- Tree Canopy Shadows: On
- Shadow Filtering: High
- Specular Distance: 100%
- HDR Lighting: On
- Bloom Lighting: Off
- Water Detail: High
- Water Reflections: On
- Water Ripples: Off
- Window Reflections: On
- Blood Decals: On
- Distant Land: On
- Anti-aliasing: Off
Under Gameplay options, I would also suggest turning off 'Save on Travel' as it has been known to cause problems. You may want to install an Autosaver mod from the Nexus instead.
Tools
| Name | Description | Installation |
|---|---|---|
| BOSS | Used to automatically sort the load order of your plugins. | Download 'BOSS.Archive.7z' and extract the files to a new folder. Rename the folder 'BOSS' and move it to your main Oblivion directory. You'll run the program with BOSS.exe. |
| Wrye Bash | Mod manager that is also used for creating the Bashed Patch. | Download 'Wrye Bash 306 Standalone Executable' near the bottom of the page and extract the Mopy folder to your main Oblivion directory. When you open Wrye Bash for the first time, right-click the top bar and uncheck 'Lock Load Order'. |
| TES4LODGen | Used for generating distant LOD objects. | Download the main file and extract the exe to your main Oblivion directory. You should rerun this program anytime you change your load order. |
| Landscape LOD generator tes4ll-v5 | Used for generating distant LOD meshes and normal/color maps. | Download 'Landscape LOD generator 5_03' at the bottom of the page and extract the files into your OblivionData folder. Rerun this program anytime you download a mod that changes the landscape. |
| Multi Purpose GUI | A GUI for running tes4ll. | Download mpgui_1_22 from the old files and run the setup.exe. I would suggest installing the program at OblivionDatainites4ll for ease of use. You don't need to install the templates. |
| 4GB Patch | Allows users with a 64-bit(x64) operating system to use more memory when running Oblivion. Don't use this if you are on a 32-bit(x86) OS or if you're unsure. | Run the program and select your Oblivion.exe file. |
| OBSE | Oblivion Script Extender adds new scripting functionality to Oblivion and is a requirement for many mods. | Download obse_0021.zip and obse_loader.zip at the top, and extract to your main Oblivion directory in that order. |
| Oblivion mod manager | Very simple mod manager for anyone not using Wrye Bash to install mods. If you are using Wrye Bash then there's no need to install this. | Download the full manual version and extract to your main Oblivion directory. |
OBSE Mods & Patches
| Name | Description | Installation |
|---|---|---|
| EngineBugFixes | Fixes bugs, as you may have guessed from the name. | Extract main file to Oblivion directory. Find the EngineBugFixes.ini, open and set everything in the [Patch] section to 0. |
| Oblivion Graphics Extender | Oblivion Reloaded's predecessor. Obviously you want to skip this one if you are using Oblivion Reloaded. We'll be downloading the core-retro version and using it solely for better quality water reflections. | Download 'OBGE Core - Retro 3-0-0' from the old files and extract only the OBGEv2.dll to your OBSEPlugins folder. Run the game once to create an OBGE.ini in your DocumentsMy GamesOblivion folder which we'll configure later on. |
| Oblivion Stutter Remover | Prevents or mitigates a number of issues related to stuttering and framerates, and can reduce the frequency of stutter related crashes. | Download 'OSR_4-1-37' and extract the Data file to your Oblivion directory. Open the sr_Oblivion_Stutter_Remover.ini and make the following changes: bReplaceHeap = 1, fMaximumFPS = 60, iHeapAlgorithm = 3, iHeapSize = 768. You can change max fps to anything below 60 if you want. |
| OneTweak | You can skip this mod if you're using Oblivion Reloaded. Borderless windowed mode and no crashing when you Alt+Tab. | Extract the OneTweak.dll and OneTweak.ini to your OBSEPlugins folder. |
| SkyBSA | An OBSE DLL that forces Oblivion to handle BSAs and loose files the same way that Skyrim does. | Extract to your OBSEPlugins folder. |
| Unofficial Oblivion Patch | Fixes lots of stuff. | Download and extract the Unofficial Oblivion Patch main file to your OblivionData directory. Delete the 'UOP Vampire Aging & Face Fix.esp', which isn't necessary while using a bashed patch. |
| Unofficial Shivering Isles Patch | Fixes lots of stuff in SI. | Download and extract to the appropriate directory. |
| Unofficial Oblivion DLC Patches | Fixes lots of stuff in the DLC plugins. | Download and extract, you should only use the esps for the DLC that you have installed. |
User Interface
| Name | Description | Installation |
|---|---|---|
| DarNified UI | The quintessential UI mod for Oblivion. | Download the optional 7z archive and extract the fonts, menus, meshes and textures to OblivionData. If you want to get rid of quest journal entry popups then look in the custom_files folder, extract the 'empty.xml' and rename it to 'quest_added.xml' then move it to OblivionMenusgeneric and overwrite the original file. You can find the configuration file for DarN at 'menusprefabsdarnhudmainmenu_config.xml'. You may want to try turning the compass frame off to make the HUD a little cleaner. There are some required font changes that have to be made in Oblivion.ini after installing, otherwise your font will look messed up. We'll take care of that in the INI Tweaks section below. |
| Color Map Mod zipversion | Colorful world map for Cyrodiil. | Download and extract to the appropriate directory. OMOD version is here for those using a mod manager. |
| Coloured Enemy Health Red | Makes the enemy health bar above the crosshair change from default - red depending on how much health the enemy has left. | Download and extract to the appropriate directory. |
| DenockArrowToo | Denock a readied arrow by pressing the ready weapon key. If you plan to use archery at all then this is a must-have mod. | Download and extract to the appropriate directory. |
| Dot Crosshair | Changes the large vanilla crosshair to a dot for better immersion. | Download and extract to the appropriate directory. |
| FOV Modifier | You can skip this mod if you're using Oblivion Reloaded. Changes your FOV. I use 80, but most people seem to like 90 for 16:9. 75 is the default FOV for Oblivion. | Download and extract to the appropriate directory. |
| Morths Local Map | This mod colorizes the local map similar to using the ini edit bLocalMapShader=0, but it lets the background shine through for unexplored/inaccessible areas and still has a bit of the vanilla 'hand drawn map' appearance. | This is the first of a few mods that you need to install with a mod manager. Personally, I found Oblivion mod manager to be the easiest one to work with. Here's a tutorial if you need some help using it. Select 'No' for the DarkUIified map background option. |
| nONatees colored Shivering Isles map | Colorful world map for the Shivering Isles. | Download and extract to the appropriate directory. I use the 'visually_divided' folder. |
| Spell Deletion | Remove unwanted spells by pressing the delete key. Unlike other spell deletion mods, instead of just hiding your removed spell this one renames it as well, which lets you reuse the original name if it was a spell you made yourself or lets you repurchase the spell if it was one that you bought from a merchant. | Download and extract to the appropriate directory. |
| Spell Icon Replace 1 Final | You can skip this mod if you're using OOO. Replaces many spell/effect icons with recolored or new graphics. | Download and extract to the appropriate directory. |
| Toggleable Quantity Prompt - Updated | With this mod, you can auto-confirm the quantity prompt ('How many?') and confirmation prompt that you get when an item or spell is transacted (moving/buying/selling/dropping). The end result being that your shopping trips go by much, much faster than they did before. | Download and extract the '01 Main' folder to OblivionData. In the TQP.ini, I changed 'set aveTQP.iDefaultAction' to 1 so that one item will be auto-confirmed when I click, but you can set it up as you wish. The ini has details on the different settings. |
| Oblivirim - Xbox 360 Controls For Oblivion | Preset JoyToKey and Xpadder profiles for those wanting to use a controller with Oblivion. I use Xpadder, but JoyToKey should work just as well. | You'll need to set up either Xpadder or JoyToKey to use these obviously, which goes outside the scope of this guide. If you do some googling you should be able to find what you need. |
| UI Controls for Oblivion (UICO) | Makes the navigation and control of Oblivion's user interface a lot more intuitive when using a controller, similar to how Oblivion runs on the Xbox 360 version. See here for details on how the mod works. | Open the main file archive and extract the contents of the '[00 DarN]' folder to your OblivionData directory. |
INI Tweaks
You can find your ini files in 'DocumentsMy GamesOblivion'.
Oblivion.ini
More distant trees for better visuals, lowers fps slightly.
Disables intro videos.
See light sources from further away, no noticeable fps cost.
Better looking shadows, no noticeable fps cost.
This tweak is only needed by ENB users. Open RendererInfo.txt in your Oblivion.ini directory and find the line that says '3.0 Shaders'. If it says yes next to it, then you should use this tweak. If it says no then leave it as is, note that you may experience some minor visual glitches if you use an ENB though.
Prevents some issues if you're using a controller with Oblivion.
Better water reflections, no noticeable fps loss.
Less zoomed-in camera when talking to NPCs.
No autosave when entering a new area, prevents corrupted savegames and crash to desktop.
Required changes for DarNified UI.
Makes trees appear more smoothly upon loading a cell with little impact on overall framerate.
Much better performance in some areas with only a small loss of grass.
Max distance grass.
For BSA redirection - handled in the Bashed Patch section.
OBGE.ini
This setting controls the resolution of water reflections, it can have a noticeable effect on fps around water. Try 1024 if you're using a weaker PC.
Base Texture Packs
| Name | Description | Installation |
|---|---|---|
| Oblivion Upscaled Textures (OUT) | AI upscaled texture replacement for nearly everything in Cyrodiil. | Download and extract the contents of 'kart_OUT_default' to your Oblivion/Data directory. Do NOT overwrite any files! SKIP when asked! |
| Shivering Isles Upscaled Textures (SIUT) | AI upscaled texture replacement for nearly everything in SI. | Download and extract 'kart_SIUT_default' to your Oblivion/Data directory. Do NOT overwrite any files! SKIP when asked! |
| DLC Upscaled Textures (DLCUT) | AI upscaled texture replacement for nearly everything in the DLC. | Download and extract 'kart_DLCUT_4x' to your Oblivion/Data directory if you use any DLC other than SI and KOTN. Do NOT overwrite any files! SKIP when asked! Download and extract 'kart_KNUT_4x' to your Oblivion/Data directory if you use the KOTN DLC. Do NOT overwrite any files! SKIP when asked! |
| Really Textured Normal Maps for Vanilla | Improved normal maps for better visuals on nearly everything in the game. | Download and extract all three files. Either exclude or delete the normal maps from 'OblivionDataTexturestreesbranches' as they can cause flickering tree trunks. If you are planning to use OOO Shivering Isles, then you should also exclude/delete the 'weapons' and 'armor' files from the 'RTNM Shivering Isles Fixed' archive as they can cause visual issues with Dark Seducer/Golden Saint armor. |
| Qarl's Texture Pack III Redimized | High resolution texture replacement for nearly everything in Cyrodiil. | Download and extract to the appropriate directory. |
| QTP3 UOP350 Compatibility Patch | Compatibility patch for QTP3 and UOP. | Download the patch from the optional files section and extract to the appropriate directory. |
| Bomret's Texture Pack for Shivering Isles | High resolution texture replacement for nearly everything in the Shivering Isles. | Download and extract to the appropriate directory. |
Architecture, Dungeons & Landscape
| Name | Description | Installation |
|---|---|---|
| Arena HD | High resolution textures. | Download and extract to the appropriate directory. |
| Arena Redone HD | Another HD Arena mod that deviates further away from vanilla Oblivion with its visuals. I only use the new mesh and textures for the Basin of Renewal, which Arena HD didn't change. | Download and extract the following mesh and textures from the main file, then add them to the appropriate directories: '01 UOP Patch [Optional]meshesarchitecturearenabloodworkscistern01.nif' The textures from '00 Core [2K]texturesarchitecturearena' that begin with 'bloodwork' or 'circularfloor' - 8 in total The textures from '00 Core [2K]texturesarchitecturearenaArenaRedonebloodworks' that begin with 'cistern' - also 8 in total |
| Better Chapel Altars | High resolution textures. | Download and extract the main file, then the optional file to the appropriate directory. |
| Bettys Sewer Textures | High resolution textures. | Download the 'BettysSewerTextures' main file and the update and extract them to the appropriate directory. |
| Caves retexture | High resolution textures. | Download and extract the 2k version to the appropriate directory. |
| Cloud Ruler Temple HD | High resolution textures. | Download and extract the main file and the update to the appropriate directory. |
| Detailed Terrain | High resolution textures. | Download the main file, the update, and the Shivering Isles optional file. Install all three with Oblivion mod manager. Install the update after the other downloads and OBMM will keep asking you if you want to overwrite files, hold CTRL and click 'yes' to get through the prompts. After installing this you may still get flickering blood textures on the ground. If you do and it bothers you enough to want to fix it, you can either delete Textureslandscapedefault.dds & Textureslandscapedefault_n.dds or disable blood decals in your Oblivion.ini (fDecalLifetime=0.0000, iMaxDecalsPerFrame=0). |
| Evandars Snow Texture Replacer | High resolution textures. | Download and extract only the two palepass ice textures from 'dungeonsmisc' to the appropriate directory. |
| Farm fence retexture and UV maps | High resolution textures. | Download and extract to the appropriate directory. |
| Gecko's Ayleid Ruins Textures V2 | High resolution textures. | Download and extract the Parallax main file to the appropriate directory. Exclude/delete the following meshes from 'MeshesDungeonsAyleidRuinsExterior': arbridge01.nif, arbridge02.nif, arbridge03.nif, arbridge04.nif |
| Gecko's Fort Interior Textures | High resolution textures. | Download and extract to the appropriate directory. |
| Gecko's Imperial Dungeon Textures | High resolution textures. | Download and extract to the appropriate directory. |
| Hi-Res Road Texture - QTP3 Replacement | High resolution textures. | Download and extract to the appropriate directory. |
| HiRez Architecture- Daedric Shrines | High resolution textures. | Download and extract to the appropriate directory. |
| Improved Signs | High resolution textures. | Download the 'ImprovedSignsComplete' main file and extract to the appropriate directory. Delete/exclude the esp, you don't need it. |
| Kvatch HD | High resolution textures. | Download and extract both the main file and the update to the appropriate directory. |
| Oblivion Realm HD | High resolution textures. | Download and extract to the appropriate directory. |
| Rocks retexture | High resolution textures. | Download and extract the 2k version to the appropriate directory. |
| Statues HD | High resolution textures. | Download and extract to the appropriate directory. |
Flora & Water
| Name | Description | Installation |
|---|---|---|
| AliveWaters | You can skip this mod if you're using OOO. Adds more stuff underwater so it isn't so barren. You only need the assets, no esps. | Download and extract to the appropriate directory, exclude/delete the esps. |
| Alive Waters Updated | You can skip this mod if you're using OOO. Fixed esp for AliveWaters. | Download the 'Alive Waters No Fish' main file and extract the esp to OblivionData. |
| Better Nirnroot - Hi-Res | High resolution textures. | Download and extract to the appropriate directory. |
| Enhanced Vegetation | Better LOD billboards for trees, and the option to make all trees/shrubs and their shadows 25-50% larger. My screenshots and videos were made using the 150% plugin and I definitely recommend using that one even though it can cause some minor visual issues. | Download only the 'Enhanced Vegetation - Plugins v1dot1' main file and extract the esp of your choice from the 'timescale 30' folder. |
| Enhanced Vegetation - Darker trunks version | Adjusts the textures from Enhanced Vegetation so that they're not so bright and look better in game. | Download the 'Normal Res textures' main file and extract to the appropriate directory. |
| Enhanced Vegetation - Shivering Isles | Adjusts Shivering Isles tree shadows/billboards for those using Enhanced Vegetation 125% or 150%. | Download and extract the plugin of your choice to OblivionData. |
| Enhanced Water v20 | You can skip this mod if you're using Oblivion Reloaded's water. Better looking water. | Download and extract the HD esp to OblivionData. |
| Enhanced Water v20 HD - SI Addon | You can skip this mod if you're using Oblivion Reloaded's water. Better looking water for Shivering Isles. | Download and extract to the appropriate directory. |
| Tree Bark HD Reduced | High resolution textures. | Download and extract to the appropriate directory. |
| Improved Doors and Flora | High resolution textures. | Download both main files and extract to the appropriate directory. Make sure the update is extracted last. |
| Improved Fruits Vegetables and Meats | High resolution textures. | Download and extract to the appropriate directory. Same as before, make sure you get the update. |
| Improved Trees and Flora | High resolution textures. | Download and extract to the appropriate directory. |
| Improved Trees and Flora 2 | High resolution textures. | Download all three files and extract 'Improved Trees and Flora 2' then 'ITF2Update' then 'ITFBark2012' to the OblivionData directory. |
| Luna's Ironwood Nut Retex | High resolution textures. | Download and extract to the appropriate directory. |
| Mandrake retexture | High resolution textures. | Download and extract to the appropriate directory. |
| New shadows for trees | High resolution textures. | Download and extract to the appropriate directory. |
| Real Lava | You can skip this mod if you're using Oblivion Reloaded's water. Better looking lava. | Download the 'Real Lava 1_3' main file and extract to OblivionData. |
| Smooth Grass | Better looking/more colorful grass. | Download whichever main file you prefer and extract the new textures to DataTexturesPlants. |
Character Improvements
| Name | Description | Installation |
|---|---|---|
| Beautiful Arena Spectator | Beautiful may be a bit of an overstatement, but they're better off than they were before. | Download and extract to the appropriate directory. |
| Elaborate Eyes Simplified | High resolution textures. | Download and extract to the appropriate directory. |
| Emperors Face Redone | Fix Patrick Stewart's dopey face. | Download and extract to the appropriate directory. |
| IAFT Improved Argonian Facial Textures | High resolution textures. | Download and extract the highres folder to the appropriate directory. |
| IFT Improved Facial Textures | High resolution textures. | Download and extract to the appropriate directory. |
| Lifelike Eye Normalmaps | High resolution textures. | Download and extract the 'Lifelike Eyes Vanilla' main file to the appropriate directory. |
| Natural Faces | High resolution textures. | Download and extract to the appropriate directory. |
Weapons, Armor & Clothing
| Name | Description | Installation |
|---|---|---|
| Weapon Improvement Project | High resolution textures. | You don't need the esp. Download and extract all of the meshes/textures except for the following to the appropriate directories: Exclude/delete 'MeshesWeaponsEbonyDagger.nif' Exclude/delete all of the meshes from 'MeshesWeaponsIron' NOT ending with 'Rusty' or 'Fine' - 7 total Exclude/delete the 'MeshesWeaponsSteel' folder |
| Improved Amulets and Rings | High resolution textures. | Download and extract to the appropriate directory. |
| Initial Glow Redux | Removes the persistent glow from enchanted items, so your nice new textures aren't covered up. | Download and extract only the 'Initial Glow Redux.esp' to OblivionData. |
| Insanity's Improved Armoury Compilation 1.21 FINAL Mirror 1 Mirror 2 | High resolution textures. The main website has some issue with its downloads, so I put a few mirrors up. | Download and extract the '00 Core Files' folder, then the '02 Alternate Glass - Darker Green' folder to OblivionData. |
| Madness Armor and Weapons Retex | High resolution textures. | Download and extract to the appropriate directory. |
| Mythic Amber Armor | High resolution textures. | Download and extract to the appropriate directory. |
| Recoloured Underwear | Better looking underwear, good for OOO users since Seducer enemies fight you in their undies. | Download and extract the Black textures to the appropriate directory. |
| Visually Improved Staffs | High resolution textures. | Download the main file and extract all the folders. |
| Visually Improved Staffs for OOO | Only for OOO users. High resolution textures. | Download and extract to the appropriate directory. |
Animals & Creatures
| Name | Description | Installation |
|---|---|---|
| Akatosh Retexture | High resolution textures. | Download and extract to the appropriate directory. |
| Mythic Animals | High resolution textures. | Download High res parts 1 and 2 and extract to the appropriate directory. |
| Mythic Creatures | High resolution textures. | Download and extract to the appropriate directory. |
| Mythic Ghosts and Goblins | High resolution textures. | Download and extract the Meshes and Textures to OblivionData. |
| Mythic Madness | High resolution textures. | Download and extract to the appropriate directory. |
| Improved Flame Atronachs | High resolution textures. | Ignore the 'optional flame replacer' file. Download and extract to the appropriate directory. |
| Improved Storm Atronachs | High resolution textures. | Download and extract to the appropriate directory. This time, make sure to also get the optional file 'optional SharperShock texture'. |
| Slaughterfish Retexture | High resolution textures. | Download and extract to the appropriate directory. |
Weather & Environment
| Name | Description | Installation |
|---|---|---|
| Autumn Trees | Falling leaves added to some of the trees in northern Cyrodiil. | Download and extract the esp, textures and the '1_LOW_FREQUENCY' meshes from the 'LEAF_FREQUENCY_VARIATIONS' folder to the appropriate directory. |
| Better window enviromental map | Improves the reflection on windows and materials like silver or glass. | Download only the optional file and extract it to the appropriate directory. |
| Dousing The Flames | This simple mod will 'douse' the eternal fires at Kvatch, Bruma Mages Guild and around oblivion gates when you finish their respective quest lines. | Download and extract to the appropriate directory. |
| Falling Stars | Shooting stars that appear on nights with clear weather. | Download and extract to the appropriate directory. |
| Natural Environments | Improves vanilla weather and adds birds and insects to the environment. | Download and extract the following files to OblivionData: the 'Meshes' and 'Sound' folders Natural_Habitat_by_Max_Tael.esp 'NaturalEnvironments' and 'Sky' from the Textures folder, make sure not to install the menu folders |
| Improved Fires and Flames | High resolution textures. | Download the 'Improved Fires and Flames' main file and the optional file and extract to the appropriate directory. |
| Improved LightBeam | Better lightbeams. The meshes seem to be buggy and caused my hands to disappear while standing in the beam, so we'll only grab the textures. | Download and extract only the textures to OblivionData. |
| Improved Sky Textures | High resolution textures. | Download and extract the files to the 'TexturesSky' folder and also to the 'TexturesNaturalEnvironmentsSky' folder. |
| Kat's Actually Decent Enviroment Map | Better reflection on glass objects. | Download and extract. |
| RD Natural Weather Unoffical Test Fix | Fixed Natural Weather esp that also alters the colors so that they're closer to vanilla Oblivion. | Download and extract 'Natural_Weather_HDR_by_Max_Tael_RD.esp' from 'Simplified Weather ESPRD Color Corrected' to OblivionData. |
| Skygazer Moons for Oblivion | High resolution textures. | Download the main file and extract 'DataTexturesSky' to the same directory in your Oblivion folder. |
Miscellaneous
| Name | Description | Installation |
|---|---|---|
| Alluring Wine Bottles with Real Glass | You can skip this mod if you're using OOO. High resolution textures. | Download and extract to the appropriate directory. |
| Better Potion Bottles Reduced | You can skip this mod if you're using OOO. High resolution textures. | Download and extract to the appropriate directory. |
| Book Jackets: Oblivion | High resolution textures. | Download the 'Book Jackets Oblivion High Res' main file and extract the 'meshes', 'Textures', and 'Book Jackets Oblivion.esp' to OblivionData. |
| Book Jackets KOTN | High resolution textures. | Download and extract to the appropriate directory. |
| Book Jackets KOTN HD update | Even higher resolution textures. | Download and extract to the appropriate directory. |
| Grimbots DLC Book Jackets | You can skip this mod if you're using OOOSI. High resolution textures. | Download the 'Shivering Book Jackets' main file and extract to the appropriate directory. Download the Spell Tomes main file if you have the DLC for it installed. |
| GW71 Life Detect | Better detect life magic effect. | Download and extract to the appropriate directory. |
| High Quality Rugs | High resolution textures. The optional file should already be included in the USIP. | Download the main file and extract the following textures to the appropriate directory: the 'texturesarchitecture' folder the 'texturescluttercastleinterior' folder and the 'texturescluttermageguild' folder exclude/delete the lower/middle/upperclass folders and the sefurniture folder |
| HiRes Hay Bail Textures | High resolution textures. | Download and extract to the appropriate directory. |
| HiRes Pewter | High resolution textures. | Download and extract to the appropriate directory. |
| HiRes Silver and Gold Clutter | High resolution textures. | Download both files and extract to the appropriate directory. |
| Hi-res Soul Gems | You can skip this mod if you're using OOO. High resolution textures. | Download and extract to the appropriate directory. |
| Improved Skulls and Bones and Ironwork | High resolution textures. | Download and extract to the appropriate directory. |
| Isathars Improved Tapestries | High resolution textures. | Download the 'Improved Tapestries v1.1' main file and extract only the textures to OblivionData. |
| Mesh Improvement Project | High resolution textures. | Download and extract the following files to the appropriate directories: '00 CoreMeshesClutterStamper.nif' and everything in '00 CoreTextures' except for the 'Weapons' folder |
| Nighteye Shader Replacement | Skip this one if you're using Oblivion Reloaded. Better nighteye effect. | Download and install via mod manager. I use the 'desaturate' effect. |
| better ropes | High resolution textures. | Download and extract to the appropriate directory. |
| Darooz Upperclass clutter | High resolution textures. | Download and extract to the appropriate directory. |
| No More Annoying Comments - Skills and Training | Removes training comments from NPCs and the immersion breaking comments that NPCs make on your character's attributes as well. Ex. 'Look at the muscles on you!' | Download and extract to the appropriate directory. |
| No More Annoying Merchant Comments - Combined | Removes annoying comments that merchants make after an item is bought/sold. This mod and Toggleable Quantity Prompt go together like peanut butter and jelly since TQP lets you buy/sell much faster than you could before. | Download and extract 'No More Annoying Merchant Comments - Combined.esp' to your Data folder. |
| Oblivion Symphonic Variations Music Suite | New music created to blend in with Oblivion's soundtrack. I consider many of the tracks to be on par with the original score, give it a try if you want some new tunes to listen to. | Download the main file and extract the mp3s you want to their appropriate directories in OblivionDataMusic. I use all of them except for the new battle themes. |
| No more crosshair on Rythe's painting | Fixes a rather humorous mistake made by Bethesda. | Download the version you want and extract to the appropriate directory. |
| Painters Touch | High resolution textures. Covers all non-unique paintings in Oblivion and the Shivering Isles. | Download the 1024 main file and extract to the appropriate directory. |
| Paintings Variation | NOT LORE FRIENDLY, they look so good in game I had to put them on here though. Skip this one if you're a purist, Painters Touch will still cover most of the paintings in the game. | Download and extract to the appropriate directory. |
| Quest NPCs Run | Makes slow walking quest NPCs run. | Download and extract into the Data folder. |
| TD_Lower_Clutter | High resolution textures. | We're going to Russia for this one, click the big Download button for the main file and then click the orange text underneath it for the update. Extract the main file then the update to your Oblivion directory. |
Distant Landscape & AWLS
The 2nd and 3rd mods in this section add lots of distant objects to the game resulting in much better visuals and a greater sense of immersion, but also resulting in the biggest fps hit in the entire guide. If you're having performance issues already then you may want to just get Koldorn's LOD Noise Replacer and AWLS.
| Name | Description | Installation |
|---|---|---|
| Koldorns LOD Noise Replacer | You can skip this mod if you're using Oblivion Reloaded. Better looking distant terrain. | Download and extract the texture from the 'Light' folder to the appropriate directory. |
| Evenstars Colourwheel LOD Update | More distant objects. | Download and extract only the meshes in the '01 Dungeons' folder to OblivionData. |
| Optimized VWD | More distant objects. | Download and extract 'Optimized VWD - Wayshrines' to OblivionData. |
| Really AEVWD | More distant objects. | Download both main files and from the optional files download: 'RAEVWD QTP3 Texture Pack by Brumbek' and 'RAEVWD SI Bomret Textures'. First, from the 'RAEVWD' main file, extract the following files to the appropriate directories: the '00 Core' folder '03 City ArchitectureMeshesArchitectureAnvilanvillighthouse01_far.nif' & 'AnvilLightHouseBaseEntrance_far.NIF' the 4 meshes from '03 City ArchitectureMeshesArchitecturecathedral', ignore the crypt folder the '05 Wilderness ArchitectureMeshesArchitecturefarmhouse' and '05 Wilderness ArchitectureMeshesArchitecturelowerclass' folders and '06 Ayleid RuinsMeshesdungeonsayleidruinsexteriorarstatue01_far.nif' Then from the 'RAEVWD SI Edition' main file, extract: the '00 Core' folder the '06 Mushroom Trees' folder Extract the 'RAEVWD QTP3 Texture Pack by Brumbek' and 'RAEVWD SI Bomret Textures' optional files |
| Animated Window Lighting System and Chimneys | Lights up windows at night and adds smoke to chimneys. | You definitely want to install this one with a mod manager, follow the instructions under 'Installing AWLS with OBMM' in the description. Going through the setup wizard in OBMM I chose: 'Medium Smoking Chimneys', 'Yes', 'No', 'Yes', 'Orange - Brumbek Recommends' until Mages Guild Circle Window then 'Default Bright Orange', 'Blue', 'Yes', 'Brumbek Yellow Multi-Color', 'Emerald Green', 'Dirty Orange', and 'More Colors'. CTRL+Click Yes to Overwrite. After installing, if the windows on Sheogorath's Palace look like they're flickering while standing far away you can download this file and extract the 'textureslowresarchitecturepalace' folder to fix it. |
Bashed Patch
- First, sort your load order using BOSS.exe
- Next, open Wrye Bash.exe and put a checkmark next to every mod so that they're all active
- Click the 'Installers' tab on the top bar, select 'No' if you don't know/care what it is, and then right-click the left pane. Click 'BSA Redirection' to uncheck it, then right-click and select it again to put the check back
- Back on the 'Mods' tab, right-click on the Bashed Patch and select the top Rebuild Patch option, click OK to deactivate the mods when prompted
- Under Tweak Actors put a check next to 'Irresponsible Creatures' so that animals can't call the cops on you
- Under Tweak Assorted put a check next to 'DarNified Books'
- Under Tweak Settings right-click 'Crime: Alarm Distance' and select 2000 for less psychic guards
- Under Tweak Settings right-click 'Greeting Distance' and select 100 for less NPC chatter
- Under Tweak Settings right-click 'Warning: Exterior Distance to Hostiles' and select 2000 for reduced combat distance outdoors, which makes it easier to fast travel
- Uncheck 'Cobl Catalogs' and 'Race Records' on the main left pane
- Build Patch, and once it's finished make sure that the Bashed Patch is checked/active before closing Wrye Bash
TES4LODGen
- Run TES4LODGen.exe
- From 'DataDistantLOD', take 'Tamriel_0_15.lod', 'Tamriel_-1_15.lod', 'Tamriel_2_11.lod', 'Tamriel_3_10.lod', and 'Tamriel_3_11.lod', and move them somewhere for safekeeping. Then delete all the remaining files in your DistantLOD folder
- Move the 'FarmHouse' and 'LowerClass' folders from 'OblivionDataMeshesArchitecture', and put them with the lod files. Make sure that they're out of your Meshes folder
- Run TES4LODGen.exe again, and when it finishes put the meshes and lod files that you set aside back where you got them from, overwriting the files that are there
tes4ll
First we'll run the program for Cyrodiil:
- Run mpgui.exe, go to File->Open Batch.. and select 'OblivionDatainites4lltes4ll_all.mpb'
- Click the 'Plugins' tab, and then click the Plugins.txt box on the top-left
- Next the 'Worldspace' tab, click on Read Worldspaces
- On 'LOD Meshes', change Mid Resolution to Ultimate Resolution
- For 'Normal Maps', put a check next to 'Make normal maps', then put a check next to 'Fake shadows'
- On the 'Color Maps' tab, put a check next to 'Regenerate texture cache' and 'Make color maps'
- Finally, go to 'Start Process' and put a check next to 'Overwrite the original files'. Then click the 'Click me if you are ready' bar
Before starting the next step, download this esp made by Pherim. Put it in your OblivionData folder and make sure not to activate it in Wrye Bash or anything. Now we'll run tes4ll for the Shivering Isles:
- Run mpgui.exe, go to File->Open Batch.. and select 'OblivionDatainites4lltes4ll_all.mpb'
- Click the 'Plugins' tab, and then click the Plugins.txt box on the top-left. After that, put a check next to the new 'SI_HM_fix.esp'
- Next the 'Worldspace' tab, click on Read Worldspaces and then select: SEWorld 'Realm of Sheogorath' [0009F18] from 'Oblivion.esm'
- On 'LOD Meshes', change Mid Resolution to Ultimate Resolution
- For 'Normal Maps', put a check next to 'Make normal maps', then put a check next to 'Fake shadows'
- On the 'Color Maps' tab, put a check next to 'Regenerate texture cache' and 'Make color maps'
- Finally, go to 'Start Process' and put a check next to 'Overwrite the original files'. Then click the 'Click me if you are ready' bar
- Once tes4ll is finished, close the program and delete the 'SI_HM_fix.esp' from OblivionData
The End
- If you aren't going to be using an ENB, you should enable hardware anti-aliasing and anisotropic filtering. I'd suggest 2xMSAA and 8xAF for the settings.
- Set your Oblivion.ini to read-only once you're done with the guide, so that the Oblivion launcher doesn't overwrite any of your settings in the future.
- Whenever your Graphics Card receives a driver update you'll start getting a popup saying 'Oblivion will now detect your video hardware and set video options accordingly'. This won't affect your ini file if you have it set to read-only, but it is kind of annoying to see every time you start the game up. If you want to 'fix' this you can remove your Oblivion.ini and set it on your desktop or in another folder, then start Oblivion up and let it create a new Oblivion.ini. Close the game and take the 4 'uVideoDeviceIdentifierPart' settings under Display from the new ini and copy them to your old ini, overwriting the values that you have there, then set your Oblivion.ini back to read-only and put it back where you got it from, overwriting that new ini file that the game made. This will remove the popup until the next time your Graphics Card gets an update, then you have to do it all over again. Like I said, if you have your Oblivion.ini set to read-only the popup won't affect anything so you only need to do this if the popup is bugging you enough to go through the trouble of making these changes.
Cinematic ENB
If you'd like to use the same ENB that I show off in the screenshots and videos, you can download Cinematic ENB for Oblivion - New Dimension from here. Just follow the installation instructions, and make sure to disable letterbox.
To enable SMAA follow the instructions here. You'll want to replace 'Skyrim' for 'Oblivion' obviously. Set 'weird_steam_hack' to 1 in the injector.ini file, and I'd also suggest setting the quality to ULTRA since I didn't notice a performance hit from doing so.
You can download my enb files, which include other tweaks, and my other ini files from the guide's Nexus page. You can just overwrite your enb files with mine if you wish to use my settings. To be safe don't do this with any of the other inis, they're just there as a reference.
Credits
Hishutup, Soire (Red), and Synthetik for the Mythic Dawn Oblivion Modding Guide:
http://wiki.step-project.com/User:Hishutup/Sandbox2
Bevilex for his modlist for Oblivion - Graphics:
http://www.nexusmods.com/oblivion/mods/47591
Check out the Nexus page if you need to ask for help with the guide, or if you want to leave comments/feedback/screenshots/videos:
http://www.nexusmods.com/oblivion/mods/47666
There are multiple options for how to get from point A to point B in Oblivion: walking, running, sneaking, riding a horse, fast travel. This section provides some of the details of how to get around, and some tips for how to do it more efficiently.
- 1Walking and Running
- 1.2Carrying Lots of Items
- 3Alternatives to Fast Travel
- 3.2Horseback
- 3.4Swimming
Walking and Running[edit]
The most basic ways of moving around are walking and running. These two actions are very similar, except for the speed at which you move and how quickly fatigue regenerates.
Note that on the Xbox 360 & PS3, there is no key to toggle between walking and running. Instead, the speed of your movement is controlled by how far forward you press the thumbstick. In third-person view mode, you can see the progression from slow walk to fast walk, then slow run to fast run as you press the thumbstick further.
Sneak mode can be enabled when either walking or running. Details on sneaking are provided in the section on Sneak.
Moving Faster[edit]
The factors contributing to your movement speed are (in order of importance):
- The weight of the armor you're currently wearing.
- Having a weapon equipped, and whether that weapon is drawn or sheathed.
- Your Speed attribute.
- Your Athletics skill.
The most obvious way to improve your speed is to increase your Speed attribute, but that takes a long time and requires huge increases to have any noticeable benefit. Setting up gmail in outlook 2016 for mac. Sheathe your weapon if you can't keep up with a fleeing enemy; unequip your weapon to go even faster. Special moves to go even faster are described below. You can also utilize Fortify Speed enchantments on armor for a permanent increase when wearing the armor, or use potions for a more temporary increase. Skooma is ideal for this.
Carrying Lots of Items[edit]
If you suddenly can't move at all, one likely cause is that you are over-encumbered. Your encumbrance is determined by your Strength, and can be modified by Burden or Feather spells.
Feather can be obtained in many ways, with varying strengths and durations:
- Enchanted items, such as rings. These are available as random loot, can be created at the Arcane University, or can be created from a Sigil Stone. This provides a constant effect, but the magnitude of the Feather spell is relatively small (25 points to maximum 125 points with a transcendent sigil stone)
- Potions. Premade Feather potions range in strength from 25 to 100 points. Even stronger potions can be made at high levels (>200 points). Up to four potions can be drunk at once.
- Spells. The spells that can be bought are Ease Burden, Lighten Load, Pack Mule, and Beast of Burden. Custom spells can also be created. Note that if your custom spells have different names, they can be cast simultaneously, allowing an additional 500 points or more to be carried. See Human Freight Train example on Useful Spells page for details. (However, the maximum duration of custom Feather spells is only 120 seconds, less than the for-purchase spells).
One glitch you may encounter when using Feather spells and potions is that they may only work properly if you are already over-encumbered. If you are not over-encumbered, the magnitude of the spell or potion can be less than expected, even zero. So pick up all the loot you want to carry and then cast your spells and drink your potions.
- Note: This is because Feather removes encumbrance, rather than directly increasing carrying capacity, although the user interface does not make this obvious. For example, if you are carrying 200 pounds of loot and equip two rings of 125pts of feather, the first ring will have the full 125pts of feather, while the second ring will only provide the number of pounds of encumbrance that it can remove, that is 75pts, bringing your encumbrance to zero. If you pick up 50 more pounds of loot, you can unequip and re-equip the second ring to get that additional 50pts of feather. Also note that your carrying capacity will now remain boosted by 250pts until you remove the rings. Another example, if you are carrying 300 pounds of loot and equip the above rings both rings will provide the full 125pts each, but the user interface will still show you having 300 pounds of encumbrance, yet your max encumbrance will show that you have an additional 250pts of carrying capacity. It is strange and not intuitive until you understand how feather works.
Moving Lots of Items with your Horse[edit]
Being able to open a Container while on your Horse provides you with an incredible opportunity to move a large mass of items.
- While riding your Horse, position it so you can activate the container and open the inventory list.
- Then transfer anything you want to your personal inventory. Move as much as you want, you don't need to be worried about being over-encumbered.
- Then travel to your destination. You will not be able to fast travel and your horse will be unable to jump. Also, don't get off your horse because you will immediately be over-encumbered.
- At your destination, while still riding your horse, transfer the items into another container. If you dismount, you will have to drop enough items on the ground to un-encumber yourself. Setting up a Non-Traditional Container or locating a Traditional Container at your destination, before you make the trip, is advisable.
Special Moves[edit]
Most games have their special or not-quite-intended moves that allow you to perform actions not possible normally - rocket-jumping, strafe-running, bunny-hopping, grenade-jumping.. So does Oblivion.
- Goron roll - If you have Acrobatics at Journeyman (50) level, you gain the 'dodge' ability - hold block, direction and press jump and you will quickly roll in that direction. While mostly useless in combat, 'dodge forward' allows you to travel faster than most horses if used repeatedly.
- Paintbrush climbing - Due to a glitch in the game, paintbrushes fail to fall to the floor and remain levitating in air when you drop them from your inventory. You can build stairs of them and climb them to reach hard to reach places. You can also try using some of the stone bricks from Vilverin. They are larger and easier to climb on than paintbrushes, though they are heavier.
- Stair jump - Jump off the last step of stairs or other similar climbing slope while running. With the right timing and some luck you will jump at least twice as far as normally
- Cheap Raft - use the item duplication glitch to fill a pool of water with items that float on the surface (scrolls, clothes). You can walk on them and won't sink. A simpler and less time consuming alternative is to simply cast water walking spells.
- Body Surfing - Kill a creature (the larger the better) push it into the water so it floats. Then jump on it and use your grab key to pull it in front of you while walking slowly. Free water walking, however, a simpler and less time consuming alternative is to simply cast water walking spells.
- Mountain Riding - The slope too steep to climb on foot? Take the horse, no problem climbing very steep slopes on horseback. You can even climb almost vertical slopes by wiggling your horse back and forth, going at an angle up the mountain. Eventually you'll reach the top.
- Zorro Extreme - If you plan a crazy stunt involving falling from great heights, leave the horse where you plan to land. No matter how far you fall, if you get to 'activate' the horse before hitting the ground (still midair), you will just get on its back as if nothing happened, no damage applied.
- Quake-alike jumps - You may jump constantly by pressing and holding forward (any direction) and hitting the jump button. This helps getting up some slopes quite quickly.
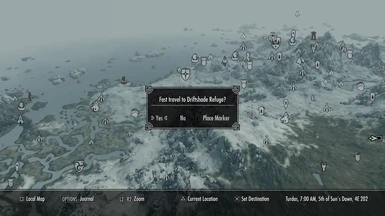
Fast Travel[edit]
You can see the locations to which you can fast travel on your world map: clicking on the white icons with a dark background moves you instantly to that location; it's almost too convenient a way to skip between locations. Except for all of the major cities, you will have to 'discover' or go normally to each location before you can fast travel to it; dark icons on a light background have been acquired by speaking to NPCs or are triggered by quests, and need to be visited in person before becoming available for fast travel. Contrary to the belief of many, you do not need a horse to fast travel: it is a feature of the game, not of the horse.
Fast Travel moves the character from one location to another as fast as it takes the new location to load; there are no encounters along the way. So it is definitely fast in terms of playing time. As for the speed with which your character travels, and therefore travel time, well..your results may vary. Probably will vary. Probably, from one set of starting point/destination to another. However, there are a few ways to ensure that your travel speed is as fast as possible.
Although Fast Travel is instant from your perspective, the game clock is adjusted by an 'estimated' travel time. The estimate is based on the speed of your horse only if you are mounted at the time - merely owning a horse is not enough. This means that fast-traveling from inside a city, where you cannot be mounted, is normally much slower than traveling from the outside world. Otherwise it is based on your own Active Speed, which means it is affected by your Equipment Weight, and even by whether or not you are in Sneak mode; having a weapon drawn also slows your regular movement and therefore fast travel.
You can not fast travel while over-encumbered; see the previous section for ways of overcoming this problem. However, if you have a temporary boost to your carrying capacity via a spell or potion, you can fast travel to any location, even if the spell/potion effect has only a few seconds before it expires. Of course once you reach your destination you will be over-encumbered again.
Fast Travel journeys that take an hour or more of game time will restore you to full health.
Using Fast Travel while on foot can cause your horse to wander off from its last known position, if you use it too many times without being mounted. Your horse will attempt to make its way (very slowly) back to the stable where you'd acquired it. To keep this from happening, never fast travel more than 2 or 3 times without locating your horse and mounting up first. When you fast travel, mounted, to the gate of a city or town, the horse will be moved to the stables nearby. After conducting you business in the city, you can then fast travel to the city stables and your horse will be waiting there for you. If you wish to travel on foot for a while and don't want your horse to wander off, leave it at the stable where you'd acquired it then set out on foot.
Alternatives to Fast Travel[edit]
Walking[edit]
Walking has lots of benefits—you can easily fight enemies, pick ingredients, walk down steep slopes safer, jump higher, sneak, swim quite fast, train your skills while walking. Using the 'goron roll' it's not slower than plain horseback riding either.
Horseback[edit]
Unfortunately, horseback riding is not as advantageous a feature as one might imagine. While there are some minor perks (e.g., Shadowmere fighting for you, traveling while over encumbered after a feather effect expires, navigating steep terrain more easily), speed is the chief advantage of riding horseback. Speed can be improved even further with fortify speed spells. Horseback riding has lots of drawbacks - you can't fight, gathering ingredients is difficult, the horse gets easily hurt from falling, you can't sneak, you get stuck at some bridges, swimming is very slow, and if you accidentally hit the horse you're sometimes expelled from guilds. Still, with a good horse and good spells, you can simply ignore most enemies, ride right through Oblivion gates and reach your target without a fight. The following pointers should help make riding horseback a more pleasant experience:
Fords[edit]
Besides the mapped huge bridge west from Imperial City and the unmapped small wooden bridge north from it, there are two fords: places with water shallow enough to pass on horseback or running without swimming. One that is south of Arcane University, by Fatback Cave, is easy to spot with lots of rocks sticking out of water. Another ford, slightly harder to spot, is located near Sideways Cave. If you want to get from the eastern side to the western side of Leyawiin, don't go right along the wall, but aim more towards the Coast Guard building - the water there is more shallow.
Shortcuts[edit]
You might hear rumors saying 'By The Nine, stay on the road; the wilderness just isn't safe'. On the contrary, the roads are packed with monsters, plus make lots of unnecessary turns and climb slopes just steep enough to make your horse hurt from the fall. Learn safe shortcuts through the wilderness if you don't like/can't fast-travel:
- Imperial City - Anvil
- Go through Weye, or take the ford south of the Arcane University (by Fatback Cave) or (preferably) waterwalk the horse straight west from Waterfront, south of Clavicus Vile's shrine (even if going from Weye), cross the Gold road south of Ceyatatar and staying off the road, on the slopes, head straight west, towards Shadeleaf Copse. Once past Derelict Mine you can turn south to Skingrad or continue west, aiming north of Kvatch. Watch out for bears by Shardrock, best pass it through the northern mountain slope. You can stay for a night in Shetcombe farm or pay a visit to Kvatch if you want, or continue west, through the wide valley, gradually turning south till you reach Lord Drad's Estate or road to it. Cut the corner with crossroads to avoid a bandit and take the remainder of road to Anvil.
- Imperial City - Bravil
- Take the ford south of the Arcane University, continue through the grassy shores of the Upper Niben and Niben Bay to safely arrive at Bravil.
- Bravil - Leyawiin
- Unfortunately there seems to be no decent land shortcut from Bravil to Leyawiin. The best bet is to waterwalk the horse first to Bawnwatch Camp, then across the river from the vicinity of Fort Irony (try landing on the southern end of Panther's Mouth). The eastern shore of the Lower Niben is safe though not really riding-friendly, so the best road is right along the middle of Niben, waterwalking with a maximum duration waterwalk spell and stopping on small islands to recast it. Also remember, you're always welcome in Border Watch, awfully bumpy but mostly safe route.
- Imperial City - Cheydinhal
- Starting near the Market District, go around the prison and through the ford slightly south of prison sewers. Even if you land straight at the start of the Blue Road, don't take it; turn southeast and, going through the plains, pass between the Ayleid ruins and the lake north of them or just north of the lake. As the plains end, the terrain gets more difficult, you may want to return to the road.
- Imperial City - Bruma
- Use the bridge in the NNW part of the Imperial City isle, straight uphill towards Glademist Cave, then along Orange Road till you cross a wooden bridge. A short while later there's a turn towards Applewatch and an easy, convenient road to Bruma North gate. You may want a more traditional route back though, as the horse is far worse at running down steep slopes than climbing them.
- Imperial City - Chorrol
- Start straight west from Weye, pass Fort Nikel and Fort Ash south to avoid some unpleasant encounters, get back on the road by Odil's Farm.
- Chorrol - Bruma
- Orange road, turn after a wooden bridge and cut the end loop through Applewatch. There's a more interesting, though definitely not safer road through Sancre Tor and near Echo Cave - keep going north where Yellow Road turns east from Chorrol.
- Chorrol - Skingrad/Anvil
- Ride southeast, down the slope north of Wendir, then south, passing Weatherleah by west. To reach Skingrad turn a bit east, nearing Brindle Home. Soon you will reach the friendly plains north of Skingrad. Alternatively turn west along the valley of Imperial Reserve, annoy bandits at Brotch Camp and land north of Kvatch on the traditional Anvil-Imperial City shortcut.
- Bravil - Skingrad
- Starting from Faregyl Inn won't do much good. Just go west from Bravil and stay far south from all the civilization, gradually turning north passing through the slopes near Silorn.
- Cheydinhal - Bruma
- Either take the official road or turn north near Roland Jenseric's cabin and improvise up the slopes till you reach the road to Bruma. The road through Desolate Mine, Hidden Camp, north of Gnoll Mountain and through Dragon Claw while extremely interesting, is also extremely dangerous.
- Cheydinhal - Leyawiin
- Obviously, cut the corner through the plains. Don't take the Yellow road, it's horrible. Cross the bridge across Upper Niben and head to Bravil along the shore. Even the problems of Bravil-Leyawiin land road are well worth it. Or, if you can - see below.
- Great Rivers
- The Great Rivers in Niben Basin are the safest, most comfortable, fastest highways in all of Cyrodiil once you make the Journeyman level (130+ sec) water walking on touch spell. From Cheydinhal through Harlun's Watch, carefully down to the Reed River and then down all the way to Leyawiin or Bravil. From Bravil to Cheydinhal with a stop in Waterfront. Safe, fast and flattest roads you can find.
- Through Elsweyr
- If you get the 'borderless Cyrodiil' mod, Bravil/Leyawiin - Skingrad/Anvil routes become a pure pleasure (for PC users, this can be achieved by changing the values of the Borders .ini file; see Ini Settings).
- Bruma - Any city
- If you have the Wizard's Tower download, you can easily travel from Bruma to any Mages Guild (excluding Kvatch) by using the teleport pads.
Through Oblivion[edit]
Mentioned here only because it exists, though not really useful. Some Oblivion gates lead to planes containing two exit gates. If instead of attacking the citadel, you exit the other gate, you land at another Oblivion gate in some distant part of Cyrodiil. This way you can cover vast distances on foot in matter of minutes. The drawbacks are crowds of Daedra, the fact that you never know which gate leads to a plane with another exit gate, and if it does, you have no idea where the other gate leads to.
Swimming[edit]
If you travel through water that is more than waist deep you will automatically start to swim. As long as you stay at the surface, breathing is not a problem. When underwater, a blue bar will appear showing how much air you have left. Water breathing spells, enchantments, and potions can increase the amount of time you can spend underwater. Water walking is also available via spells, enchantments, and potions. As opposed to Morrowind, waters in Cyrodiil are mostly safe and swimming may be often preferred to walking, especially that it's not slower. Few land enemies will follow you into water, your main water opponents are pathetic mudcrabs and weak slaughterfish, and additionally swimming increases your Athletics skill level faster than running.
If you want to swim a lot and are not an Argonian, try finding the Fin Gleam or finishing the Go Fish quest for constant effect water breathing.
Glitches[edit]
There are two minor glitches when swimming:
- If you move just slightly below water level, the underwater terrain will be as visible as the above water world.
- You can Wait underwater indefinitely without drowning. While this can be used to replenish health if you're drowning, you will still be drowning when you stop waiting, making this only of minimal use.
Getting Unstuck[edit]
Sometimes you will fall into a hole between rocks or other such place where you just can't break free, stuck in the landscape - either jumping too low or unable to jump out. In some cases, the only possible solution is reload your most recent save file. However, there are some tricks that may possibly help you to escape:
- Quit the game, then load it, as soon as it loads start walking or jumping (It may take a couple of attempts).
- If you are outside (on foot or horseback), fast travel to a nearby place.
- If you are in a town, wait for someone to pass by and attack with a weak spell, long sword, or bow. When the guard comes to arrest you, go to jail or pay the fine.
- Sometimes a Paralyze on self spell will allow you to fall out of the space.
- Drop items underneath you, then climb on top of the items and jump off of them:
- Drop your armor or weapons.
- Use a duplication glitch to create lots of books or other large objects.
- Use a permanent bound items glitch to create Bound Armor or Weapons that you can drop.
- If a crate or barrel is within reach, use its contents
- On the PC you can use the Console to get unstuck
- Enter the console command
tclto turn off collision/clipping and close the console. - Move (fly) your character out of the trap to a safe location; leave your character standing a bit above ground so that you are not stuck in the ground.
- Use the same console command,
tclto turn collision back on.
- If you get stuck somewhere while on horseback, you will need to select your horse in the console before using the
tclcommand. One way to do this is to switch to third person view so you can see your horse before opening the console. Then click on your horse in the console.
- Enter the console command